Protecting Cold Hardy Bananas Over Winter
Protecting cold hardy bananas over winter allows them to develop and maintain a stem. Ultimately this can lead to the production of flowers and fruit. For this task you will need:
- Chicken wire.
- Straw.
- Horticultural fleece.
- Clothes pegs
- Decorative covering (optional but highly recommended).
As the onset of winter approaches you will need to keep an eye on the weather forecasts. You will need to have your bananas wrapped before the first frosts. Very minor and brief frosts can be handled but it is a risky game with high stakes. It is a good idea to have all the necessary equipment on your premises. In the unlikely event that the weather forecasters get it wrong and you have only a few hours left for protecting your cold hardy bananas, you will at least not have to worry about finding all the stuff.
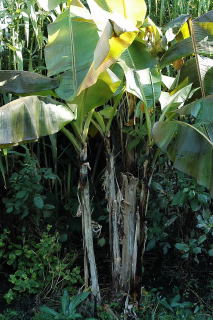
Frost singed Musa sikkimensis
1. select your plant.
In this case, an eye clearly was not kept peeled for the weather forecast. The plant sustained minor frost burns which made removing the remaining leaves less emotional.
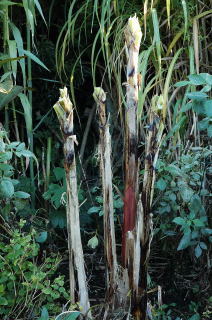
Leafless stems of Musa Sikkimensis
2. Remove the leaves.
.
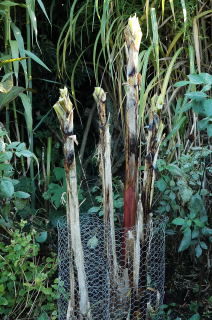
Wire frames awaiting straw
3. Make chicken wire frames to surround the trunks. Mulch the roots with manure. Soil borne beasties will pull the goodness into the soil, ready to feed your emerging plant in the spring.
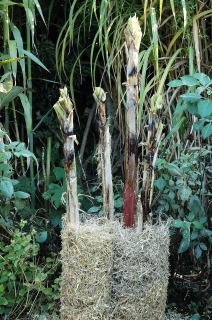
Straw filled frames
4. Pack straw around the trunks.
.
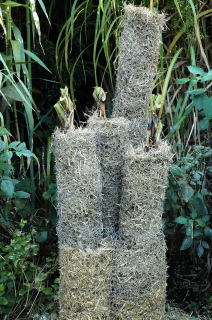
Nearly there
5. Add a second chicken wire frame and pack these with straw. Continue upwards until all the stems are covered.
Forming a frame around each individual stem is less straw intensive. The frames can be placed accurately over the stems. Straw can then be packed uniformly around each stem.
If a single frame is made around all the stems there tends to be a huge amount of straw in the middle insulating nothing more than the odd rodent. The outside of the frame also has relatively little straw.
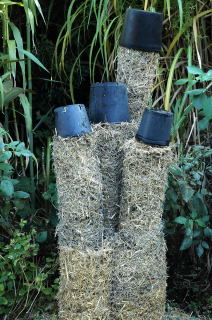
Frames packed with straw
6. Place straw filled plastic pots over the last sticking out bits.
.
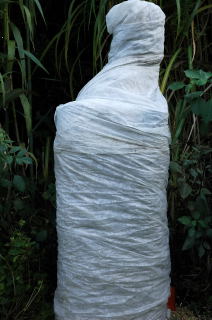
Fleece wrapped banana
7. Wrap the whole thing with horticultural fleece. You may find clothes pegs useful for securing the fleece first to the chicken wire and then to itself.
Now although technically this is a thing of beauty, visually it falls a little short of the mark. If it is in your line of vision all winter you may wish to consider wrapping the whole thing with thatch screen or the like. They are not all that expensive and may help to win over any family member who declares that they do not wish to stare at that all winter.
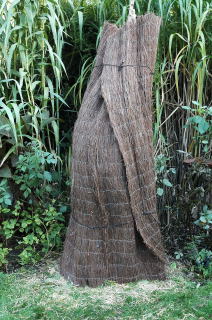
Banana plant ready for winter
8. Pretty it up.
.
9. Wait until spring..........
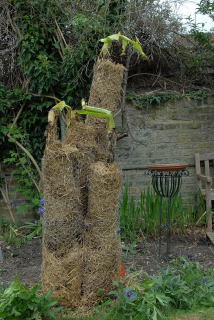
Overwintered banana showing signs of life
10. Uncover your cold hardy bananas. (With baited breath).
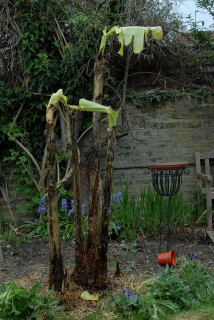
Newly unwrapped banana stems
11. Slide off the chicken wire frames. They should come away full of straw. If you can, coincide this day with mowing the lawn. You will then be ale to mix the straw with lawn clippings in your compost heap. This helps the breakdown of both components. Store the chicken wire frames for next year.
.
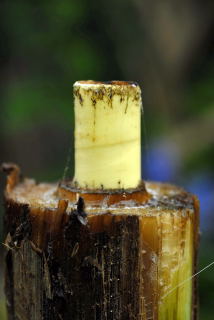
Instant growth of a trimmed banana stem
12. That is about it really. Occasionally the emerging leaves have a spot of bother pushing out of the stems due to old, rolled and stuck together brown leaves. Just remove the top couple of inches (5cms) cleanly and the new leaves will, almost in front of your eyes, begin to grow.
The shot to the right was taken 21 hours after the stem had been trimmed.
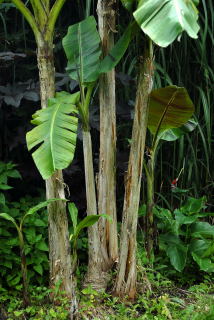
Varying the stem heights of Musa Sikkimensis
If you have a multi-stemmed banana colony, the stems will often be equal in height. This causes some congestion as all the leaves are pushing and shoving each other out of the way. One option is to stagger the stem heights. The bananas are very clever and immediately produce new leaves in proportion to the new stems. The result is different height stems with different sized leaves, a sort of banana bush.
In this example the second stem from the left is actually the original stem. Cut down low, it is no longer jostling for space with the other stems.
The banana featured in 'protecting your cold hardy banana' was a seed raised musa sikkimensis. Musa basjoo will also survive with similar treatment.
If you feel that all this seems like too much bother, it is possible to leave your bananas unwrapped for the winter. To see what happens if you leave your banana plants unwrapped, have a look here.

